Smartlist Builder (SLB) can be a great tool to pull together data to fulfill custom reporting requests. The user friendly interface and ease of use when putting together reports for Dynamics GP data make this a popular end user tool. Read this blog to learn how to use the matched tables feature in Smartlist Builder.
Matched tables can be very useful when you want to pull data into a report and are looking to use a UNION type of command to combine data from multiple tables. A great example of this use in Dynamics GP is the need to pull data from the WORK, OPEN, and HISTORY tables in a single report. The data in these tables is very similar and in SLB can be pulled into a report using the Matched Table feature which will UNION the data together.
To open the Match Tables window in Smartlist Build you want to select your main table and click the edit select table icon. When the Add Table window appears you want to select the Matched Tables button at the bottom of the window.
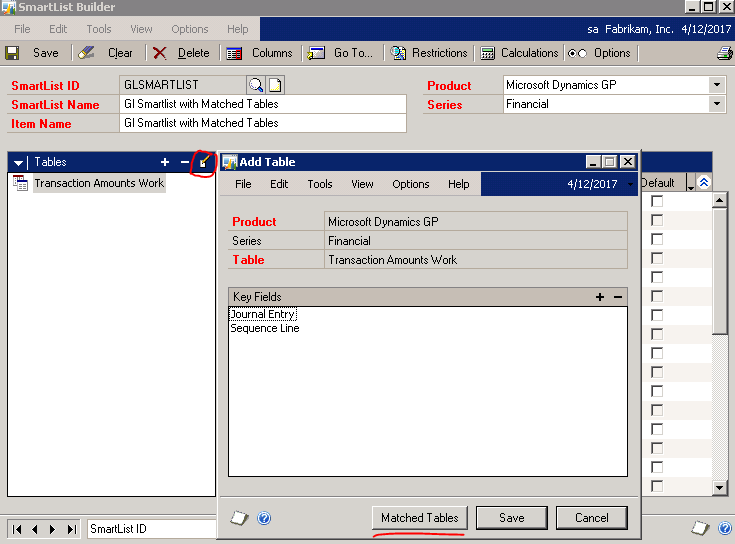
Click to enlarge
Once you have opened the Matched Tables window you want to click the + sign to Add Matched Table. In this window you will want to select the Series and Table you wish to match to your base table. In this case I want to add the OPEN table as a matched table so I would select Financial for the Series and Year-to-Date Transaction Open for the Table and click Save.
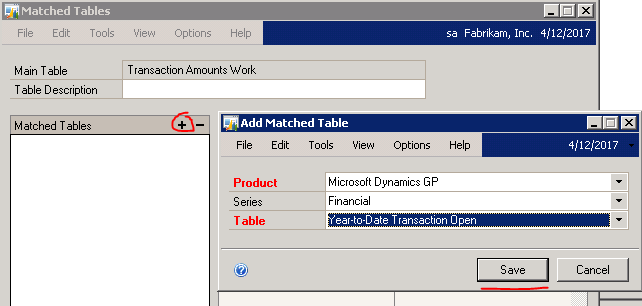
Click to enlarge
This will bring you back to the Matched Table window where you can now see all the fields from your selected table and what fields they are being matched to in your base table. There will be fields that show as [Not Matched] due to them existing in your base table but not in your Matched Table. These fields can be manually matched if there is a case where the same data field is name differently amongst two tables, but for this example we will just leave the data unmatched.
You must add a Table Description at the top of the window but also have the option of adding a description for each matched table in case you do not like the display name that is shown. You can repeat this process to add the HISTORY table as a matched table to the report. When finished click the Save button to bring you back to the main Smartlist Builder window.
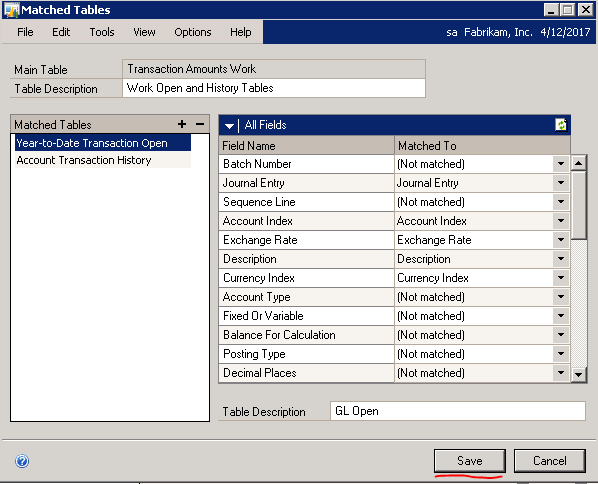
Click to enlarge
In the main window of Smartlist Builder you will now see all the field names of the matched columns from your tables. You can now go through and make further table joins to the data and set your default columns as you would in creating any report in Smartlist Builder.
Good luck with custom reporting in Microsoft Dynamics GP. Email us or call us toll-free at 877.433.0650 if you have any questions about using Smartlist Builder and Matched Tables.


